

I couldn't find a detailed write up on this specific task so as I take so much from this forum I thought it's about time I put more into it.
**This is a diary of my findings of the 3.0i auto M54 engine only. I am not a mechanic or trained professional. Follow my experience at your own risk.**
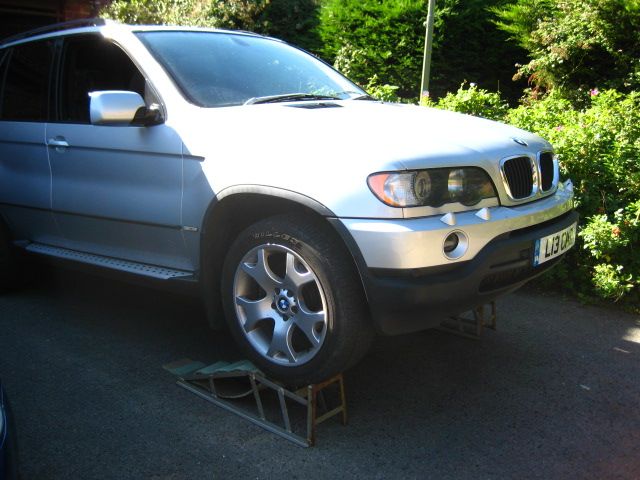
My first step was to drive the car up on ramps to aid the bleeding process later. Chocks went behind the rear wheels to prevent any nasty accidents!;
Time to start stripping down.
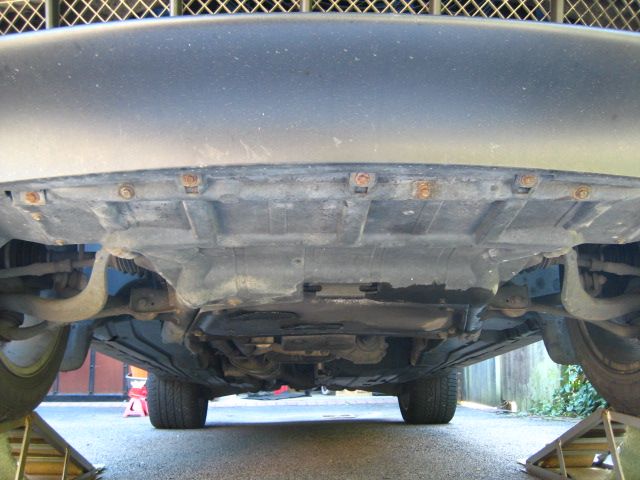
I started with the front under tray.
A seemingly endless number of 8mm and 10mm bolts;
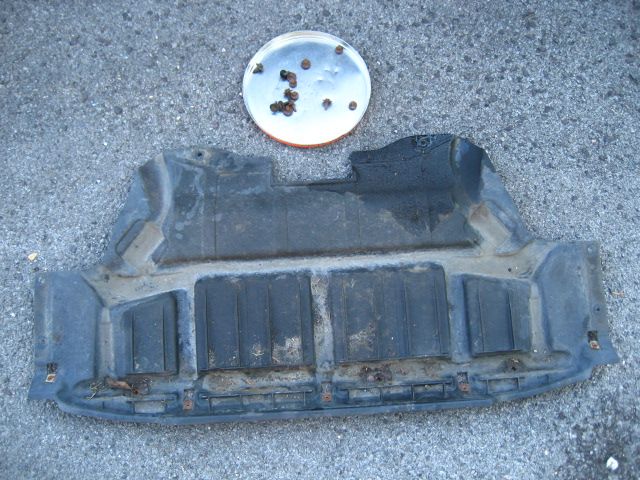
Once the cover is off I'd advise giving the metal framework of the sub frame a quick wipe down (Something I didn't realise would be helpful until too late). When the old coolant runs out it'll pass across the dirty metal otherwise. Not important if you're renewing the coolant, but if you're planning on reusing it, like me, you want to keep the coolant as clean as possible.
Next go up top.
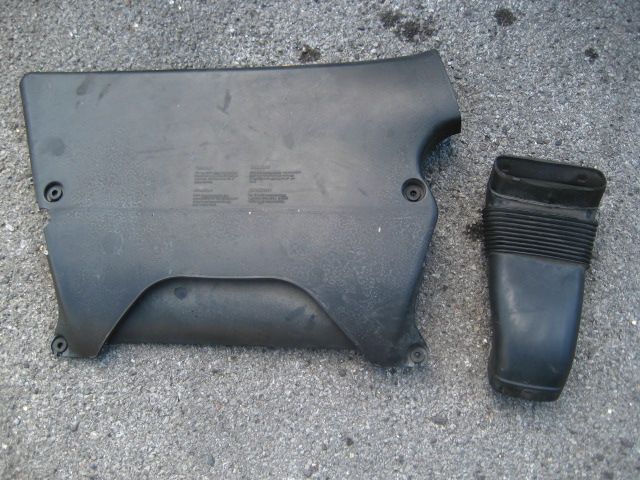
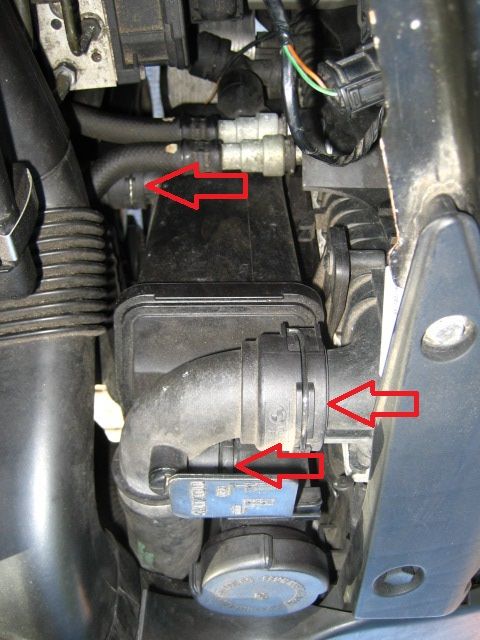
Remove the large plastic air intake housing and small ducting that leads to the air filter housing;
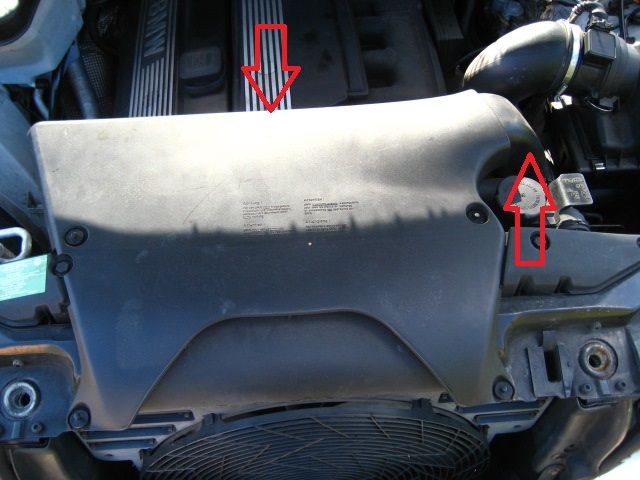
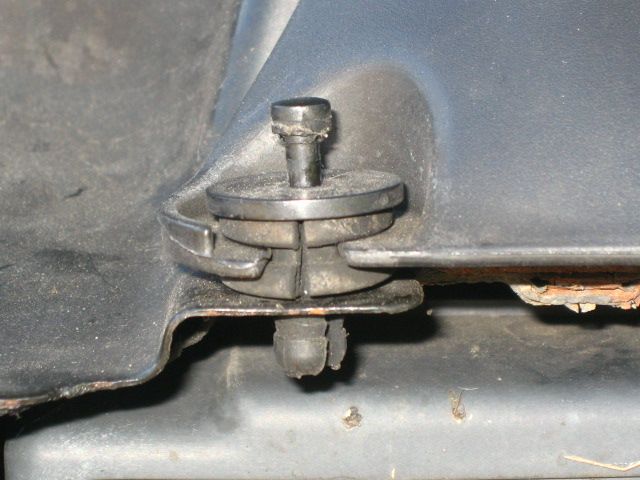
Pry the centre of this fitting up to release it;
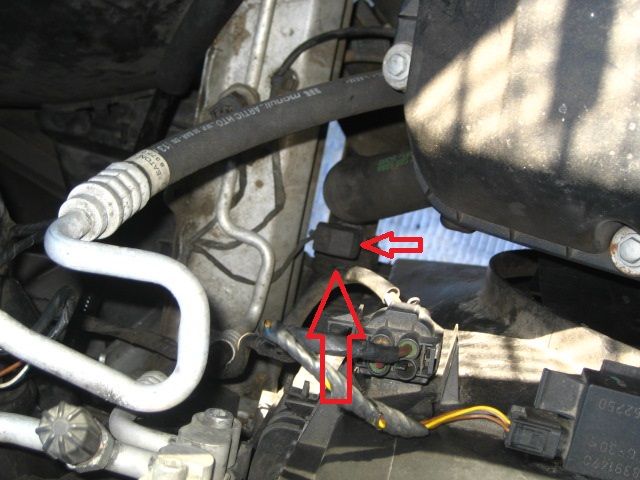
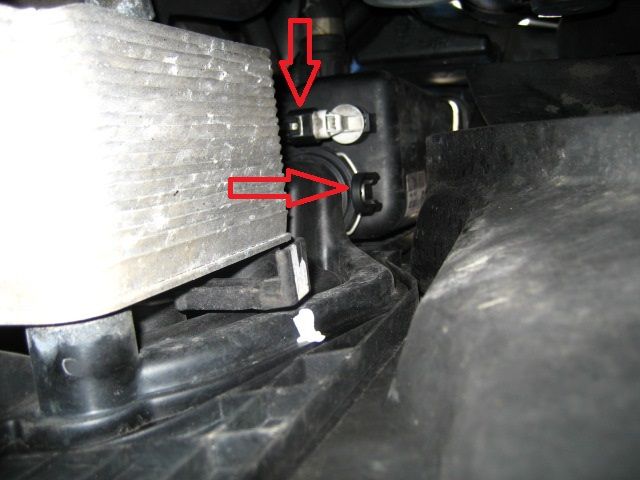
Drain the coolant system. First remove the filler cap from the expansion bottle. Then on the bottom furthest corner of the radiator from the expansion bottle is the lower radiator hose. You need to disconnect the sensor wiring and pull up the metal retaining clip from the hose connector;
Have a bucket at the ready to catch the fluid.
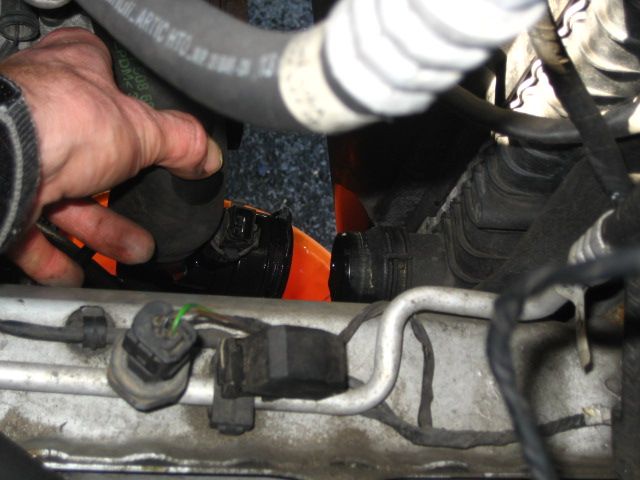
Now the fun bit - these hoses are held on firmly. Getting them off can be torturous to say the least. >:(
I used all sorts of tools to pry it off - but be careful not to break or damage any of the plastic components. Wiggling the connector helped get it past the final bit.
Leave that to drain while you move over to the expansion bottle.
At the base of the bottle remove the wiring connector from the coolant level sensor, then push the lower hose connector clip towards the centre of the car;
Back up top get a second bucket ready to catch coolant pouring out of the expansion bottle.
I started by disconnecting the hose half way up the bottle - same type of connector as on the lower radiator hose. Coolant will come out once you release this hose.
While that was draining I moved to the twin upper hose connector assembly.
There are two connectors and once again they're not easy to detach. More use of pry bars, flat headed screw drivers and obscene language.
Once the top connectors are free it's the final stage of releasing the expansion bottle.
I tried with all my might to pull the expansion bottle off the mount at the bottom - there are two connectors still in place there. I just couldn't break the tight seal no matter what I did. >:D
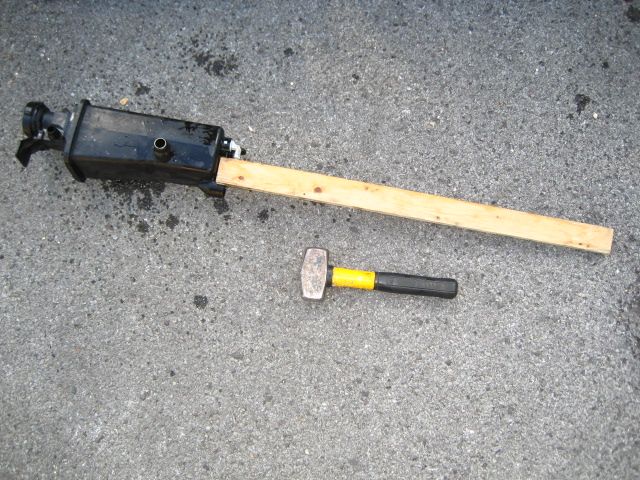
So... back under the car and with a little help from my trusty lump hammer and a spare length of wood, a careful hit on the base of the expansion bottle got it shifted off the mount.
My tools of choice;
Once the bottle is loose you can manoeuvre it out of the engine bay.
The lower mount with the bottle removed;

Rebuild time.
It's basically the reverse of removal, but here are my experiences;
Take the coolant level sensor out of the original bottle and transfer it to the new one - as well as the lower hose connector retaining clip if necessary.
Get the new bottle into place and press it down onto the mount - make sure the hook on the front edge of the bottle goes into its housing.
To be sure it was fully seated I carefully tapped the top of the bottle with my lump hammer - not too much force.
Back under the car plug in the coolant level sensor (my connector got covered in coolant during the draining process so I cleaned it off by dunking it in an old jam jar full of clean water them left it to completely dry before plugging it in).
Slide the lower hose connector clip into place. This is really awkward as there isn't room for it to slide in and out fully so you have to do it at a strange angle. My retaining clip is wobbly even when it's in place properly. I removed and replaced it a few times to make sure this was correct. I expected it to feel tighter once in place but I finally accepted it's okay for it to rattle about when its correctly seated.
Next I re-attached the expansion bottle middle hose then finally the twin hose assembly at the top of the bottle.
Then the lower radiator hose and sensor were pushed in place - I had to carefully tap the hose connector into place with my favourite hammer.
The air intake plastic cover and air filter tubing were replaced as well as the lower front tray.
I washed down the inside of the engine bay to clean off the sticky smelly coolant.
Finally you need to refill the system with coolant.
There are lots of how-to instructions for this but here's how I always do it which works a treat;
Have the front of the car jacked up as far as possible to assist the air to find its way out - the reason my X5 is on the ramps.
Turn the ignition on so the lights are on the dash - but DON'T start the engine.
Heater should be on the lowest fan speed and temperature set at max.
Remove the bleed screw;

I have an excellent funnel that fits perfectly into the neck of the bottle. It also has a gauze to catch any detritus and prevent it from entering the coolant system (sorry, no photo).
I put this in place and continue to fill the system with my recycled coolant and some distilled water to replace any split coolant until no more air escapes.
Filling the funnel means the weight of the coolant helps to force it into the system.
Once no more coolant can be added start the car and check that coolant is shooting out of the small hole on the inside of the expansion bottle neck.
Leave the car running for a few minutes, giving it the occasional prolonged rev.
Turn off the car and refill the bottle as necessary.
Keep doing this until the system is full.
Once at this stage replace the coolant bottle cap.
Restart the car and make sure hot air is blowing through the air vents.
Take the car for a decent run - but keep an eye on the temperature gauge.
DO NOT attempt to remove the coolant bottle cap for the rest of the day - or at least for many hours. It is boiling hot and under pressure!
For the next few mornings I check the coolant level and top up as necessary - it rarely needs much.
And that's it!!
Good luck....


 Never anthropomorphise computers. They hate that.